How to do Distressed Soft Locs on yourself
How to do Distressed Soft Locs
In this tutorial, I will break down how to do distressed soft locs on yourself. It is easy to do and beginner friendly. My technique focuses on creating a distressed, textured base, but you can extend this texture throughout the entire loc if you prefer. Distressed soft locs are typically done over extended soft locs, but in this case, the soft locs I am using are already long (around 24"). This style can be done by a professional or at home. I installed these distressed soft locs, at home, by myself!
This hairstyle is tension-free, making it ideal for those with sensitive scalps or anyone who wants free-flowing, non-stiff locs. Although I've created a video tutorial for this look, there's so much more to cover, so I've broken it down in detail here. The great thing is that this style is excellent for beginners and more importantly easy to take down. Which stems down to the type of wrapping hair I use and my technique!
Tools & Hair Required :
- Soft Locs Hair and Water Wave Hair Passion Twists Hair
- Gummy Styling Wax or hair gel (to lay your edges, optional)
- Crochet Latch Hook
- Scissors
- Tail Comb or any comb to section your hair
How much Hair do I need for Distressed Soft Locs?
If you're opting for the individual locs method, you'll need 65 - 80 soft loc hair strands, depending on the thickness of your locs. In this tutorial I used 80 strands and my hair was quite full. In the case of thicker soft locs, you will need 60 - 70 locs.
If you prefer to wrap the base or roots only, like this tutorial. I recommend using 2 packs of Water Wave Textured Hair. I used 1 pack plus a few extra strands to wrap the base of my locs. Each pack of hair contains 25 strands, which I split into 3 to wrap the soft locs. If you are wrapping the whole loc, you would need 2 - 3 packs, plan to use 1 strand of the water wave hair for each strand of crochet locs.

Prep for Installing Soft Locs
Before you start, set aside your distressed soft locs to make the installation process smoother. Take a strand of the Passion Twist Water Wave hair and split it into three sections. I use one of these sections to wrap each soft loc, which creates a seamless transition from the distressed part of the loc to the areas where I haven't added extra texture. Stretch out each strand further, as this will help seal the hair later on as the ends will be thinner and easier to tie.
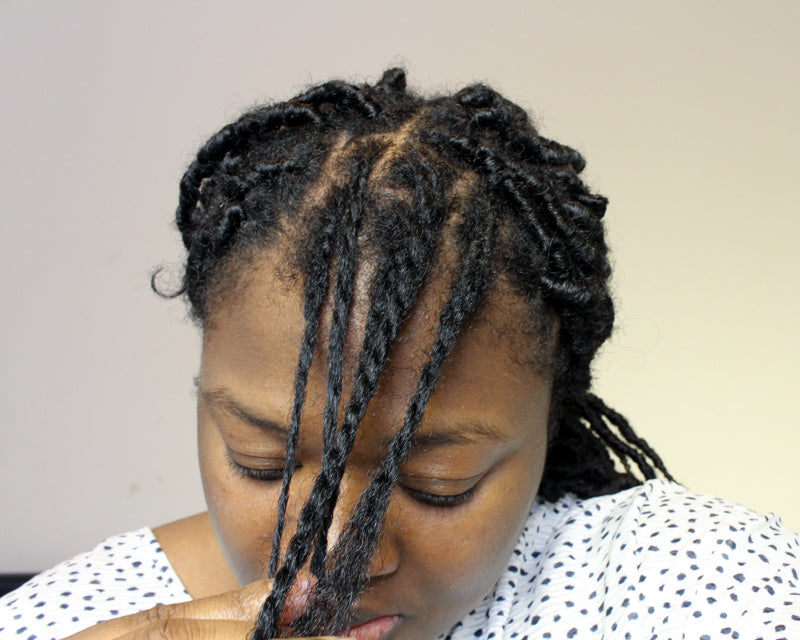
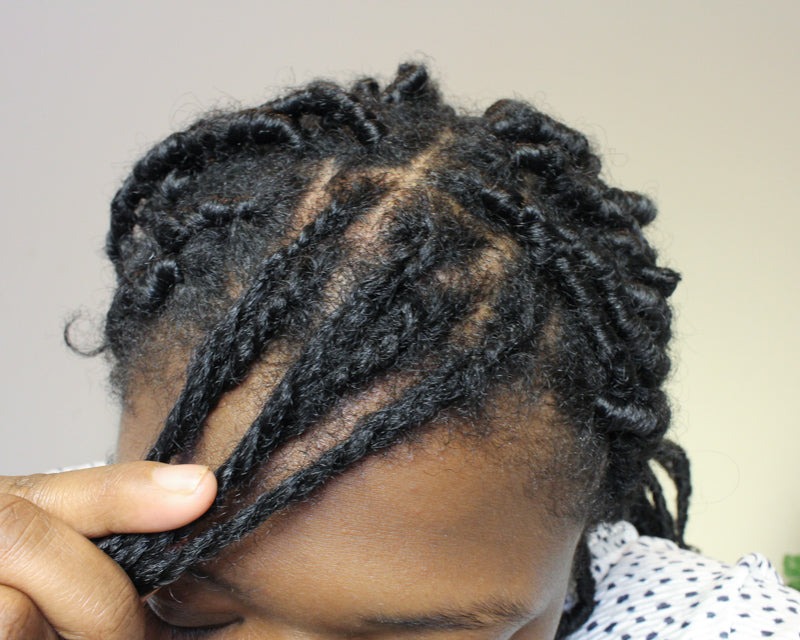
Foundation for Distressed Soft Locs
Normally people do individual braids for the foundation, but I decided to try something different for this install. After sectioning my hair with a tail comb, I braided just a small portion at the base, then twisted the rest. This method allows for a quicker installation, as you don't need to braid your hair all the way to the ends. It also makes removing the locs faster since it's easier to undo a twist compared to a full braid.
Attaching Soft Locs to your Hair
You will need your latch hook for this step. Insert the latch hook through the base of your braid, then use it to attach the soft loc that you prepped earlier with the wrapping hair attached.
Pull your braid through and leave about a finger's width of length on the side of the soft loc. This method ensures that your roots won't be bulky, giving you a more natural look once the loc is wrapped.

Wrapping Individual Soft Locs
To wrap the hair, start by wrapping it 2 to 3 times at the roots to secure the loc, then gradually move down the hair shaft. Avoid overlapping the hair while wrapping; allow some strands to peek through here and there for a distressed look. Every 3 or 4 rounds of wrapping, shift the hair upward slightly.

For this style, I only wrapped the hair until I reached the end of my natural hair, but you can wrap the entire loc if you want a different look. Once you reach the end of your hair, wrap for an additional inch before reversing direction and wrapping upwards until you're almost out of wrapping hair.
Seal the hair by tying it off. If you want easier removal later, avoid wrapping upward and simply seal the hair when you reach about an inch below the end of your natural hair.
3 comments
Great tutorial|wp_publish_time=2021-06-25T22:01:45.000Z
Thank you very much! – Jorie|wp_publish_time=2020-10-28T00:54:33.000Z
I’ve been doing my own locs for over 3 years and I see that it is an ongoing learning process. Your video was a breathe of fresh air. Thank you.|wp_publish_time=2020-10-26T18:57:20.000Z